


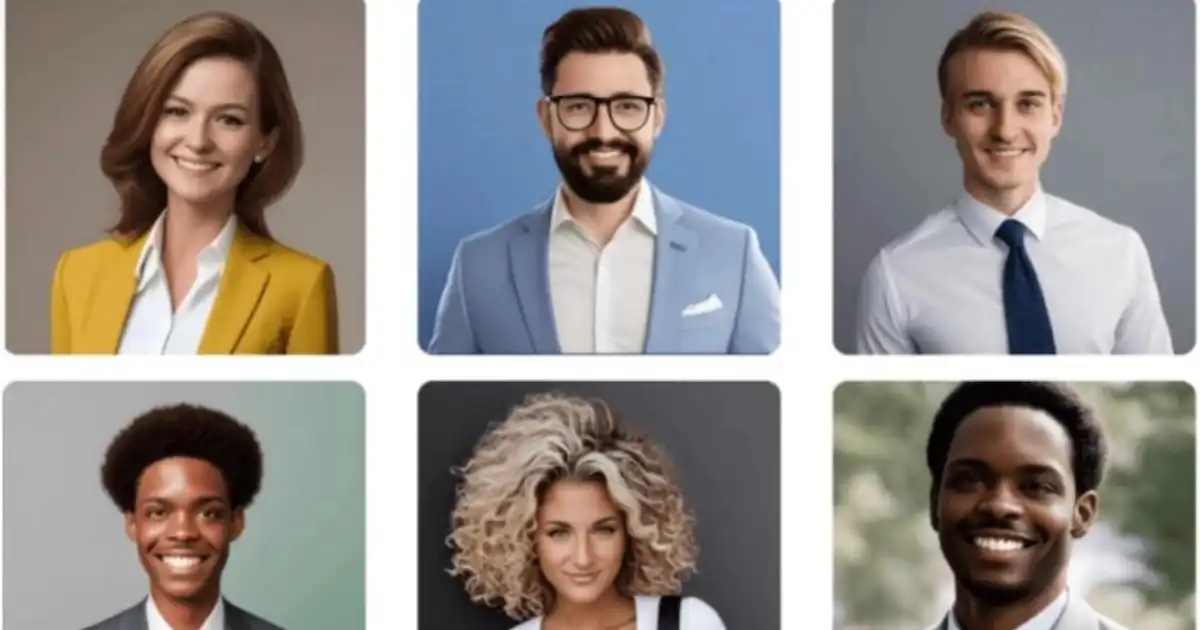
Imagine having a headshot so polished and professional that people assume it cost hundreds of dollars—or more. What if you can get that without a photographer, without expensive studio lights, and without leaving your home? You might think it’s impossible. Yet AI now makes it totally doable.
Over the past few years, artificial intelligence and machine learning tools have matured rapidly. What used to require a full photoshoot with a lighting crew and retouching is now possible with your smartphone camera + the right AI tools. The cost? A fraction of what a professional photographer would charge. And the results? Headshots that can rival studio portraits.
Wouldn’t you love to upload a few selfies and get back a refined, crisp headshot ready for LinkedIn, business cards, casting portfolios, or corporate bios? You can. You don’t need fancy gear or Photoshop skills. With AI tools, you can get multiple variations, adjust lighting, refine your expression, and even choose backgrounds. All at a low cost and often for free (or freemium).
In this guide, you’ll learn how to do exactly that. You’ll get not just an overview, but a step-by-step blueprint. From choosing the right app, to prepping your photo, to post-processing, to tricks for better results—by the end, you’ll know exactly how to get pro headshots with AI on a budget. Let’s get started.
Why Use AI for Headshots?
Before diving into how, let’s understand the why—why this is a smart move in 2025.
-
Cost-effective
Hiring a professional photographer, renting studio space, and paying for retouching can run into hundreds or thousands of dollars. AI tools are often free, $10–$50, or offer pay-per-use plans.
-
Speed
No waiting for photographer schedules or appointment setups. You can create headshots in minutes.
-
Flexibility
You can generate multiple variations—different expressions, poses, backgrounds.
-
Accessibility
You don’t need advanced photography skills or Photoshop mastery—AI handles most of it.
-
Iterative improvement
Because it’s so easy, you can try multiple versions and refine until you’re happy.
But it’s not magic. To really get a pro look, you must understand limitations and play smart. Let’s walk through the process.
Comprehensive Guide to Getting Pro AI Headshots on a Budget
I’ll break this into stages:
-
Planning & Setup
-
Capturing your input images
-
Choosing the right AI tool
-
Processing & fine-tuning
-
Final polishing & options
-
Use, export, and maintenance
1. Planning & Setup
Define your purpose and style
Ask yourself: what do I need this headshot for? Business? Creative portfolio? Social media? A casting site? The purpose will influence the style:
- Corporate headshot: clean, neutral background, suit or simple professional clothing, natural lighting.
-
Creative/actor headshot: more expressive, moodier lighting, interesting backgrounds.
-
Personal brand or influencer look: bold colors, brand context, props.
Knowing the style helps you guide the AI tool, choose wardrobe, and frame your photos.
Gather inspiration
Browse LinkedIn, actor portfolios, or branding sites. Save 3-5 headshots you like—note lighting (soft, hard, directional), background, facial expression (serious, friendly, slight smile). These will help you guide presets or prompts in AI tools.
Decide your budget
AI tools vary:
-
Free with limitations
-
Subscription or pay-per-use (e.g. $5–$30)
-
Optional add-ons for touch-ups or extra features
Stick to a small budget (say $20–$40) and you can get excellent results.
Prepare your gear
While the heavy lifting is done by AI, you still need:
-
A decent camera or smartphone with good resolution (at least 12 MP)
-
A tripod or stable surface so images are sharp
-
A clean, uncluttered backdrop (white wall, plain sheet)
-
Basic lighting (window light or inexpensive softbox/LED)
-
Some colored cards (white, gray) to assist white balance
You don’t need a full studio—just something stable, well lit, and minimal.
2. Capturing Your Input Images
AI tools work best when given good starting input. Here’s how to shoot so the AI can do its magic.
Use multiple angles and expressions
Take 5–10 photos:
-
Straight on
-
Slight left and right turn (15°, 30°)
-
Slight tilt
-
Smiling, neutral, serious, relaxed
These variations give AI more data to blend or choose best face angles.
Use consistent lighting
Even light is easier to correct. Natural window light is great:
-
Position yourself facing a large window, diffuse sunlight (e.g. with a curtain).
-
Avoid harsh shadows or direct sunlight.
-
If indoors, use two soft, diffused LED lights at 45° on both sides.
Clean background
Use a plain wall or sheet. Avoid patterns, clutter, bright objects. The simpler the background, the easier the AI will replace or refine it.
Maintain distance and framing
Keep the camera 3–5 feet away, allowing head and shoulders with some breathing space. Don’t get too close (avoid distortion).
Mind your posture, hair, wardrobe
Posture: straight but relaxed, shoulders down.
Wardrobe: choose solid colors (no bold patterns), clothes that contrast slightly with background but not clash.
Hair and grooming: same as you’d for a real portrait—tidy, no flyaways.
Facial expression: natural, subtle smile or neutral expression works best.
Check for defects
Zoom in after shooting and discard photos with blur, odd shadows, lens flare. Keep only the cleanest ones.
3. Choosing the Right AI Tool
There is a growing number of AI portrait tools, some specialized in headshots. Here’s how to choose, and a sampling of options.
Criteria for a good tool
-
Ease of use: intuitive interface, minimal technical complexity
-
Quality of output: natural, clean skin, realistic lighting
-
Background control: ability to change or remove backgrounds
-
Facial fidelity: your face should look like you
-
Cost / pricing model
-
Privacy / security: ensure your images aren’t misused
Sample AI tools (as of 2025)
-
Remini / Remini Pro — good for enhancing quality
-
Lensa AI — popular for AI portraits, backgrounds, styles
-
PortraitPro / On1 Portrait AI — more control, desktop apps
-
Fotor AI headshot generator
-
Generated Photos Headshot tools
-
Avatar AI / Artbreeder / Midjourney (with face blending)
Always check reviews and sample outputs before committing.
Free vs paid vs trial versions
Start with trial versions to test your photos. Many tools allow 1–3 free high-res outputs. Use those to compare. If you like the result, upgrade to a paid or subscription plan.
4. Processing and Fine-Tuning
Once you pick your AI tool, follow these steps to guide it and refine the output.
Upload your best input images
Select 3–5 of your highest quality photos from your shoot. The more variation, the better the tool can composite or choose.
Choose style presets or configure prompts
Most AI tools give you style presets (e.g. “Corporate”, “Cinematic”, “Moody”) or allow custom prompts. Use your inspiration images and style goals. If prompts are allowed, include:
-
Lighting direction (soft front light, Rembrandt lighting)
-
Skin tone (natural, slightly warm)
-
Background (plain light gray, white, soft gradient)
-
Expression (neutral, confident smile)
-
Clothing style (business casual, suit)
Let the AI process
This can take seconds to minutes. Depending on the tool, AI will composite, retouch, and generate one or multiple headshot candidates.
Review multiple variants
The tool often yields multiple versions. Save the ones you like. Compare differences in lighting, face angle, mood.
Reject or regenerate as needed
If you see odd artifacts (weird shadows, distorted ears, unnatural skin), reject or regenerate that version. Sometimes tweaking which input images or prompts you used fixes it.
Export high resolution
Always export the highest resolution output available (at least 3000×4000 px or equivalent). Lower res images might look fine on social media but fail for print or large formats.
5. Final Polishing & Options
After AI processing, a little manual touch-up can take a headshot from good to standout. You don’t need professional retouching—just subtle refinements.
Basic retouching with free tools
Use free or low-cost editors like GIMP, Photopea, or mobile apps (Snapseed, Lightroom Mobile). Things to adjust:
-
Exposure & contrast: brighten midtones slightly
-
Color balance / white balance: ensure natural skin tone
-
Sharpening: subtle, avoid halos
-
Skin smoothing / blemish removal: minor, only small spots
-
Background cleaning: smooth gradients, remove stray artifacts
Don’t overdo it—keep the face natural.
Crop for composition
Stick to standard headshot crops: head and shoulders, with space above head (not cutting off). Use aspect ratio like 8×10, 4×5, or square (1:1) depending on use (LinkedIn, profile).
Optional: composite backgrounds
If your background is plain or even transparent, you can add subtle professional backgrounds:
-
Light gradient or slight blur
-
Soft studio backdrop (gray, cream, dark tones)
-
Branded background for your field (e.g. library, office, abstract blur)
Just ensure the new background doesn’t overpower your face or look artificial.
Check print and digital suitability
Zoom in, view on different screens, check for artifacts. If you’ll print small business cards or large format, test small sizes too.
Save versions
Keep a master high-res version (TIFF or PNG) and generate web-optimized JPEGs (e.g. 800×1000 px) for online use.
6. Use, Export & Maintenance
Now that you have a pro AI headshot, here’s how to use and keep it updated.
Use across platforms
Use your headshot consistently across:
-
LinkedIn / professional networks
-
Personal website / portfolio
-
Social media profiles (Twitter, Instagram, etc.)
-
Business cards, resumes, press kits
-
Company or speaker bios
Consistency helps brand you.
Monitor image wear and update yearly
Your appearance may change—hair, aging, style. Schedule a refresh every 12–18 months. Use the same process to generate a new set of headshots.
Generate seasonal / situational variants
Need a holiday greeting, themed cover, marketing campaign? Use the AI tool to produce slight variants (lighter mood, softer colors).
Back up all source images
Keep your original input photos and AI outputs. If the AI tool changes or you want to reprocess later, you need those inputs.
Respect privacy / rights
Read the AI tool’s terms of service. Some tools claim rights or usage over generated images. Use reputable services and keep records of licensing.
Troubleshooting & Pro Tips
Here are common challenges and tips to overcome them.
| Issue | Likely Cause | Fix / Tip |
|---|---|---|
| Face looks unnatural or warped | AI over-editing, poor input alignment | Use more consistent input photos, limit radical poses, regenerate |
| Odd shadows or weird artifacts | Background mismatch, lighting inconsistency | Use a simpler background, more uniform lighting, reject bad variants |
| Skin looks plastic or over-smoothed | Overaggressive smoothing | Tone down smoothing, do manual spot retouching instead |
| Background looks “cut-and-paste” | Low-resolution mask, mismatch in blur | Choose subtle background, add depth (vignette, gradient) |
| Colors look off on different screens | Poor color calibration, wrong export settings | Use sRGB export, test on multiple devices, adjust curves |
| Eyes or teeth look unnatural | AI pushing extremes | Select a more natural variant, or manually mask and refine in editor |
Pro tip: Always compare your AI headshot to a real professional portrait (you find online). If yours looks close, you’re doing fine.
Example Workflow (Illustrative)
Here’s how one user might walk through the process:
-
Define purpose: LinkedIn headshot
-
Shoot input: 8 selfies with natural window light, plain wall background
-
Choose AI tool: Lensa, test the free trial
-
Upload best 4–5 photos, choose “professional / studio portrait” preset
-
Generate variants, pick top 3
-
Export high resolution
-
Open in Photopea, adjust contrast, fix slight blob in background
-
Crop 8×10, export final web and print versions
-
Use across profiles
-
Revisit next year to refresh
They spend maybe $10–$20, and end up with a headshot that looks like a $200 session.
Ethical & Practical Considerations
-
Authenticity
Don’t overly alter your appearance—face structure, features should remain yours.
-
Disclosure (if needed)
In certain contexts (e.g. model portfolios, competition), you may need to disclose that the headshot is AI-assisted.
-
Image rights & licenses
Make sure you retain full rights to your generated image. Avoid services that claim ownership over your face.
-
Avoid deepfake misuse
Ensure your headshots aren’t misused by others. Keep originals, watermark low-res versions if publicly posted.
Why AI Headshots Won’t Fully Replace Photographers (Yet)
While AI is powerful, there are limitations:
-
For highly creative photography involving props, dramatic lighting, motion, or location shoots, human photographers still have the edge.
-
AI sometimes struggles with complex hairstyles, accessories (glasses, hats), or extreme angles.
-
High-touch retouching (composite lighting, shadows, extraordinary creative direction) is beyond what casual AI tools offer.
-
Photographer collaborations and client rapport, directing expression, mood, etc. can’t be fully automated.
Thus, AI headshots are excellent for everyday needs, affordable branding, entry portfolios, and fast iterations. But for top-tier creative projects, you may still prefer a professional.
You Might Be Interested In
- How To Buy Argo Ai Stock?
- What Are The Two Types Of Neural Networks?
- How Do Humans And Ai Work Together In Real Scenarios?
- How Does Ai Assist In Writing Content Naturally?
- How Long Before Companies Start Charging For Ai Services?
- How To Add An Ai Chatbot To Shopify?
- How Do Different Ai Tools Integrate Into One Workflow?
- How To Build Lesson Plans With Ai?
- What Are Ai-driven Compliance Monitoring Tools?
- What Is Business Process Automation With Ai?
Conclusion
Getting pro headshots with AI on a budget is no longer science fiction—it’s practical, accessible, and extremely effective. With just a decent smartphone, good lighting, simple backgrounds, and the right AI tool, you can generate polished headshots that rival studio portraits. The trick is not relying on magic, but understanding the workflow: capture good input, choose the right tool, guide the AI with prompts and inspiration, pick the best outputs, and refine manually with subtle tweaks.
You’ll save money, gain control, and be able to refresh and iterate when needed. It also democratizes professional imagery—no longer reserved for those who can afford a full photoshoot. As long as you adhere to authenticity and ethical use, this method can serve entrepreneurs, professionals, creatives, actors, freelancers, and anyone who needs a headshot.
So pick up your phone, set up the light, take a few varied shots, experiment with an AI tool, and start crafting your standout headshots today.
FAQs about Pro Headshot
Can AI make me a professional headshot for free?
Yes, some AI tools can create professional-looking headshots for free, but the results and quality often depend on the platform you choose. Free versions of AI headshot generators usually offer basic editing features and a limited number of image downloads, which can be great for casual use or trying out the service. However, these free tools might add watermarks, reduce image resolution, or lack advanced editing options that give your photo a truly polished, studio-quality look.
If you want a headshot that looks more realistic, sharp, and ready for professional use on LinkedIn, resumes, or websites, you may need to upgrade to a paid plan. Paid AI tools often use higher-quality rendering, better lighting correction, and more realistic facial detailing that mimic results from real photography studios. Still, starting with a free version is a good way to explore how AI headshot technology works before investing money into premium features.
How much does it cost to get an AI headshot?
The cost of getting an AI-generated headshot can range anywhere from free to around $5–$40, depending on the quality and the service you choose. Many AI platforms offer affordable one-time payments instead of costly monthly subscriptions, making them a great budget-friendly option compared to traditional photographers who may charge hundreds of dollars per session. Some tools even have tiered pricing, where you can pay slightly more for faster delivery times or access to premium styles and backgrounds.
In general, basic AI headshots that look clean and professional can be created for under $20, while higher-end options—using advanced realism or business-specific templates—may cost a bit more. This makes AI a great alternative for students, freelancers, and job seekers who need professional portraits without spending a lot. You can easily test different styles, poses, and lighting options without having to schedule a photo shoot or pay for touch-ups later.
Can ChatGPT make a professional headshot?
No, ChatGPT itself cannot create or generate professional headshots because it’s a text-based AI designed for writing and conversation. However, ChatGPT can help you find the best AI headshot tools available, guide you through how to use them, and even suggest prompts to get better results from those platforms. For example, you can ask ChatGPT which AI headshot generator offers the most realistic results, or what kind of photo to upload for the best outcome.
Think of ChatGPT as your personal assistant that helps you choose the right AI photo tool rather than the one that actually produces the image. Once you’ve picked a service—like Dreamwave, ProfilePicture.AI, or Secta—you can upload your photo there, and the AI software will handle the image generation process. ChatGPT can also give you advice on posing, background choices, or professional styling to make your final AI-generated headshot stand out.
Are AI professional headshots worth it?
Yes, AI professional headshots are absolutely worth it—especially if you’re on a budget or need fast, high-quality photos without booking a photographer. Today’s AI tools use advanced algorithms to enhance lighting, smooth skin tones, and generate backgrounds that look as if they were shot in a studio. For professionals, job seekers, and business owners, these AI-created images can make a great first impression online at a fraction of the traditional cost.
However, the value depends on your expectations. While AI headshots are incredibly realistic, they may sometimes miss small natural details like unique facial textures or lighting nuances that a real photographer captures. For most people, though, the convenience, affordability, and speed of AI headshots far outweigh these minor limitations. Whether for LinkedIn, portfolios, or business websites, AI headshots offer an easy way to look polished and professional in minutes.
Is Dreamwave free?
Dreamwave is not completely free, but it does offer limited features or trial options to let users test its AI headshot capabilities before paying. Typically, you can preview how the AI processes your uploaded photos and view sample outputs, but to download high-resolution, watermark-free images, you’ll need to purchase a paid package. These packages usually start at an affordable price and give you access to a range of professional styles, backgrounds, and editing tools.
The paid version of Dreamwave is known for delivering realistic, studio-quality headshots that look as though they were taken by a professional photographer. It uses advanced facial modeling and lighting techniques to produce natural-looking results suitable for resumes, LinkedIn profiles, and corporate websites. While the free version gives you a good glimpse of its potential, upgrading ensures you get crisp, polished photos that represent you at your best.
