



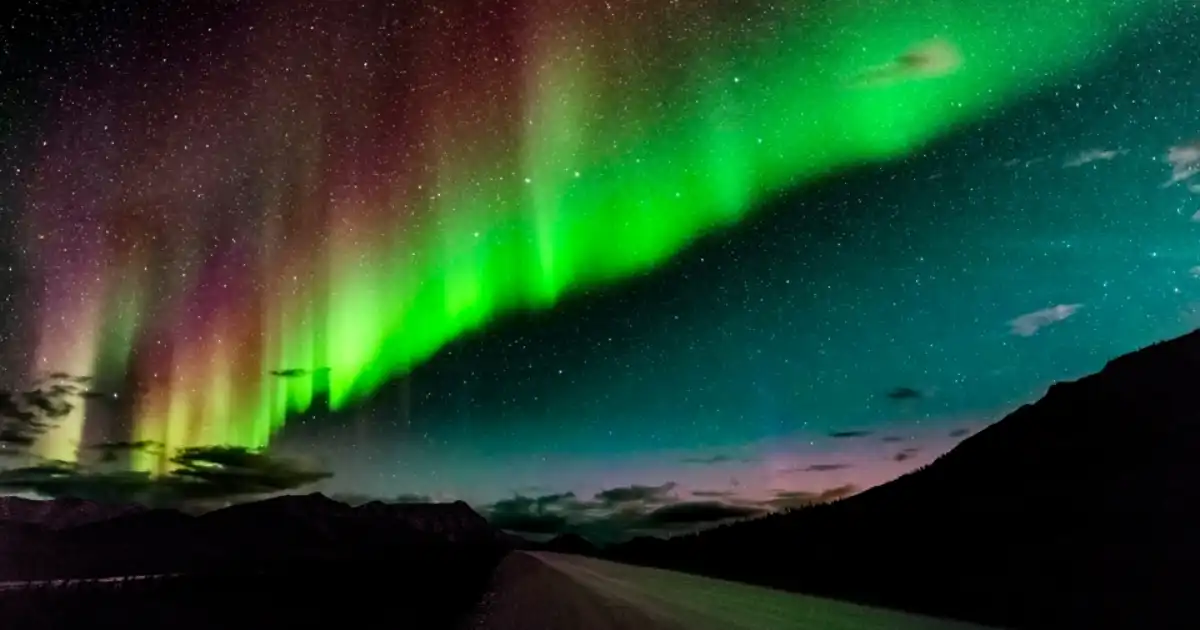
Aurora night sky photography is one of the most magical experiences you can capture with a camera. Those dancing curtains of green, pink, and purple are mesmerizing, but photographing them is a whole different beast. How To Use Tpaz Ai To Capture Aurora Night Sky Photos?
In my experience, what looks breathtaking to the naked eye often translates to a dark, noisy, or flat image on the camera sensor. The low light, long exposures, and dynamic colors create unique challenges that even the best cameras struggle with.
That’s where Topaz AI comes in. With tools like Topaz Photo AI, you can enhance aurora images in ways that make them pop without turning them into cartoonish exaggerations. Noise reduction aurora photos is a lifesaver for long exposures, and AI detail enhancement brings out the subtle streaks and waves that would otherwise get lost.
I’ve spent nights chasing auroras, only to find my images muddy or grainy. Learning how to use Tpaz AI for aurora photos has transformed the way I approach night sky photography, turning shots that were almost unusable into prints I’m proud to hang on my wall.
AI won’t replace good technique, but it bridges the gap between what your camera captures and what your eyes actually see. In this post, I’ll walk you through my practical workflow, common pitfalls, and tips that make a real difference when editing aurora photos with AI.
Aurora Night Sky Photography
Before AI even enters the picture, capturing the aurora correctly is essential. In my experience, a tripod is non-negotiable. Even minor shakes can ruin long exposures, especially when shooting at 15–30 seconds to capture aurora movement.
Camera settings are another big factor. I usually shoot in RAW, ISO 800–3200 depending on conditions, and use a wide aperture (f/2.8–f/4). Shutter speed is tricky too short and you lose detail, too long and the aurora streaks blur beyond recognition.
Preparing photos for AI editing starts at this stage. RAW files retain maximum dynamic range, which gives Topaz AI more data to work with for noise reduction and detail enhancement.
White balance matters too; I set a cooler tone in-camera, because warming it up later can exaggerate noise. Lens choice is often overlooked fast wide-angle lenses capture more sky without diffraction.
In the field, I also bracket exposures whenever possible. AI can’t fix completely blown highlights or underexposed shadows, so capturing as much detail as possible upfront is crucial. Understanding how your camera interprets night sky colors will save hours in post-processing and ensure Topaz AI night sky enhancement looks natural.
Why Use Topaz Photo AI for Aurora Images
Topaz Photo AI is a game-changer for night sky photographers. The first thing I notice is how it handles noise. Long exposures and high ISO settings introduce grain that simple Lightroom sliders can’t fully remove. Noise reduction aurora photos in Topaz AI preserves fine details while cleaning up the background, so stars don’t turn into blobs.
Detail enhancement is another big benefit. Subtle aurora streaks, wave textures, and faint colors that disappear in the RAW file suddenly pop. I’ve seen AI algorithms go overboard with sharpening in bright daylight photos, but for auroras, Topaz strikes a nice balance. Artifact removal is also key hot pixels, sensor dust, and lens flare from city lights are all handled without affecting the main subject.
Color correction is where I think Topaz AI really shines for aurora photography. It can recover subtle tones in the greens and purples that often get flattened by the camera. I usually combine denoising and detail enhancement first, then fine-tune color to match what I actually saw in the sky. It’s also faster than doing multiple Lightroom layers, especially for batch processing a series of images.
Step-by-Step Workflow Using Topaz AI
Here’s my go-to workflow for Topaz AI night sky enhancement:
-
Import RAW Files
Start by bringing in unprocessed RAW files. I avoid JPEGs at this stage because they’ve already lost detail. Topaz AI performs better when it has the full dynamic range.
-
Initial Noise Reduction
I usually select the “Low Light” AI model for aurora photos. Adjust the noise reduction slider until the sky is smooth but stars remain crisp. Avoid pushing it too far or stars can look smeared.
-
Enhance Detail
Next, I run detail enhancement. I pay attention to aurora structures this is where you can bring out subtle waves without creating halos. Sometimes I mask the foreground so it doesn’t become over-sharpened.
-
Color Correction
I tweak the vibrance and hue slightly. Topaz AI does a good job of keeping colors natural, but a small adjustment ensures aurora greens and purples match what I saw in person. I avoid oversaturation here.
-
Artifact Removal
Hot pixels and lens spots often appear after long exposures. I use Topaz AI’s artifact removal to clean these up, especially around the edges of the frame.
-
Masking & Local Adjustments
For tricky areas like trees or mountains, I use masks to apply enhancements selectively. AI can sometimes exaggerate textures in foreground elements, so I keep the sky fully enhanced and the foreground subtle.
-
Export
I save as TIFF if I plan to do further edits, or high-quality JPEG for quick sharing. Batch exporting is a lifesaver when processing a time-lapse sequence.
Advanced Techniques
Topaz AI isn’t just one-click magic; choosing the right AI model is crucial. For auroras, I stick with “Low Light” or “Standard” for detail, rarely “Severe Noise,” which can over-smooth. Masking is another game-changer. For example, I mask stars separately from the aurora ribbons to avoid sharpening halos around them.
Batch processing is something I rely on heavily when I capture multiple exposures in a session. Set up presets with your denoise, detail, and color correction settings. This saves hours and ensures consistency across a series. One trick I’ve learned is to slightly underdo sharpening if needed, I touch it up later in Lightroom. AI can exaggerate fine noise as texture if pushed too far.
Edge cases exist too. If the aurora is faint or the sky is very dark, Topaz AI might try to brighten noise as if it were detail. I counteract this by combining mild exposure adjustments in-camera or Lightroom before running AI.
Tips for Better Capture Before Editing
Even the best AI can’t fix a poorly captured photo. Stability is critical use a sturdy tripod and consider a remote shutter or intervalometer. ISO settings need balance: too low and the aurora fades; too high and you overwhelm the AI with noise.
I also recommend pre-focusing manually at infinity or on a distant light. Autofocus often hunts in the dark, and AI can’t reconstruct blurred stars. Capture multiple exposures when possible. AI can enhance faint auroras, but it can’t create detail where nothing exists. Finally, watch your histogram keep shadows from clipping; blown highlights are tricky to recover even with Topaz AI.
Common Mistakes & How to Avoid Them
One mistake I see often is oversharpening. Pushing detail enhancement too far creates unnatural halos. Another is ignoring hot pixels they’re obvious after AI processing if you don’t clean them first.
Overdoing color saturation is common too; it turns auroras into neon stripes instead of natural waves. Finally, skipping RAW capture limits AI’s effectiveness, since JPEGs lack detail and dynamic range.
You Might Be Interested In
- API Security Best Practices for Modern Web Apps
- What Is Autonomous Agent In Ai?
- How To Turn Plain Text Into Excel Formulas?
- How Ai In Smart City Surveillance Enhances Safety?
- How To Conduct Competitive Benchmarking For Generative Ai?
Conclusion
Aurora night sky photography is challenging but deeply rewarding. Using Topaz AI for aurora photos allows you to reduce noise, enhance detail, and bring out colors that your camera struggles to capture. The key is combining good capture techniques with thoughtful AI processing RAW files, correct exposure, and masking make all the difference.
Remember, AI is a tool, not a crutch. It can amplify your mistakes as easily as your successes. Spend time in the field, understand your camera, and use Topaz AI to enhance what’s already there. In my experience, this approach yields aurora images that look alive, natural, and truly unforgettable.
FAQs about How To Use Tpaz Ai To Capture Aurora Night Sky Photos?
What is the best Topaz AI model for aurora night sky photos?
In my experience, the “Low Light” model is almost always the best starting point for aurora photography. It handles high ISO noise and long exposure grain without over-smoothing delicate aurora details. When the aurora is brighter or your ISO is lower, I sometimes switch to “Standard,” which preserves texture slightly better but can leave faint noise if pushed too hard.
It’s important to remember that no single model is perfect for every shot. I often tweak the sliders manually after selecting the model. Too much noise reduction can make the stars look smeared, while too much detail enhancement can exaggerate hot pixels. I’ve learned to preview changes at 100% before committing, because the AI can be aggressive in subtle areas of the sky.
Can I use Topaz AI on JPEG aurora images?
Yes, you can use Topaz AI on JPEGs, but the results are usually limited compared to RAW files. JPEGs have compressed color and less dynamic range, so the AI has less information to work with when enhancing details or reducing noise. I’ve tried editing JPEG auroras, and while you can improve clarity and colors, fine textures in faint aurora waves often get lost or look unnatural.
If you’re serious about aurora night sky photography AI, I strongly recommend capturing RAW files. The AI performs better, preserves more subtle tones, and allows for more aggressive adjustments without destroying the image. JPEGs can work in a pinch for social media sharing, but for prints or advanced editing, RAW is the way to go.
How do I avoid oversaturation of aurora colors?
Oversaturation is a common trap, especially when using AI tools that boost vibrance and detail automatically. I’ve seen beginners push the sliders too far, creating neon greens and purples that don’t exist in the sky. My rule is to start with subtle enhancements and adjust incrementally. Masking the aurora separately from foreground elements also helps keep colors natural.
Sometimes it helps to adjust colors in stages. I first let Topaz AI handle basic color balance, then fine-tune hue and vibrance in Lightroom or Photoshop. Avoid “one-click max saturation” approaches. The goal is to bring out the real colors you saw without exaggerating them. This keeps auroras looking alive instead of artificial.
Is it necessary to denoise before enhancing detail?
Absolutely. In my workflow, denoising always comes first. If you enhance details before reducing noise, the AI may interpret grain as actual texture, creating a chaotic, unnatural look. Noise reduction aurora photos smooths the background sky and separates stars from unwanted artifacts, which sets the stage for crisp detail enhancement.
Even mild noise can get exaggerated during sharpening, so doing denoise first ensures the AI is only enhancing real structures like aurora streaks or star edges. I usually run a light denoise and then carefully enhance details in small increments, checking at 100% zoom to avoid halos or unnatural textures. This sequence makes a dramatic difference in image quality.
Can I process a time-lapse sequence of auroras with Topaz AI?
Yes, Topaz AI works well with time-lapse sequences, and batch processing is a huge time saver. I set up consistent denoise, detail, and color correction settings for all frames to maintain continuity across the sequence. Without this, minor inconsistencies in noise or color can create flickering when the video is compiled.
However, small adjustments may still be necessary for frames where the aurora is brighter or the sky darker. Masking can be tricky if the foreground shifts slightly between frames, so I sometimes create separate masks for key elements like trees or mountains. Overall, using Topaz AI for a time-lapse drastically improves the clarity and vibrancy, making the aurora flow smoothly without overwhelming noise or loss of subtle textures.
Do I need professional photography experience to use Topaz AI for auroras?
Not strictly, but understanding basic photography principles will make your edits far more effective. AI enhances what you capture it can’t magically fix out-of-focus stars, overexposed highlights, or severely underexposed auroras. In my experience, photographers who know how to balance ISO, aperture, and shutter speed get the best results.
That said, even beginners can achieve impressive results with Topaz AI if they follow some field basics. Use a tripod, shoot in RAW, and check exposure in the camera. The AI handles noise, detail, and color better when you start with a solid capture. With a little practice, anyone can turn an average aurora shot into something truly remarkable using AI photo editing for aurora.
