



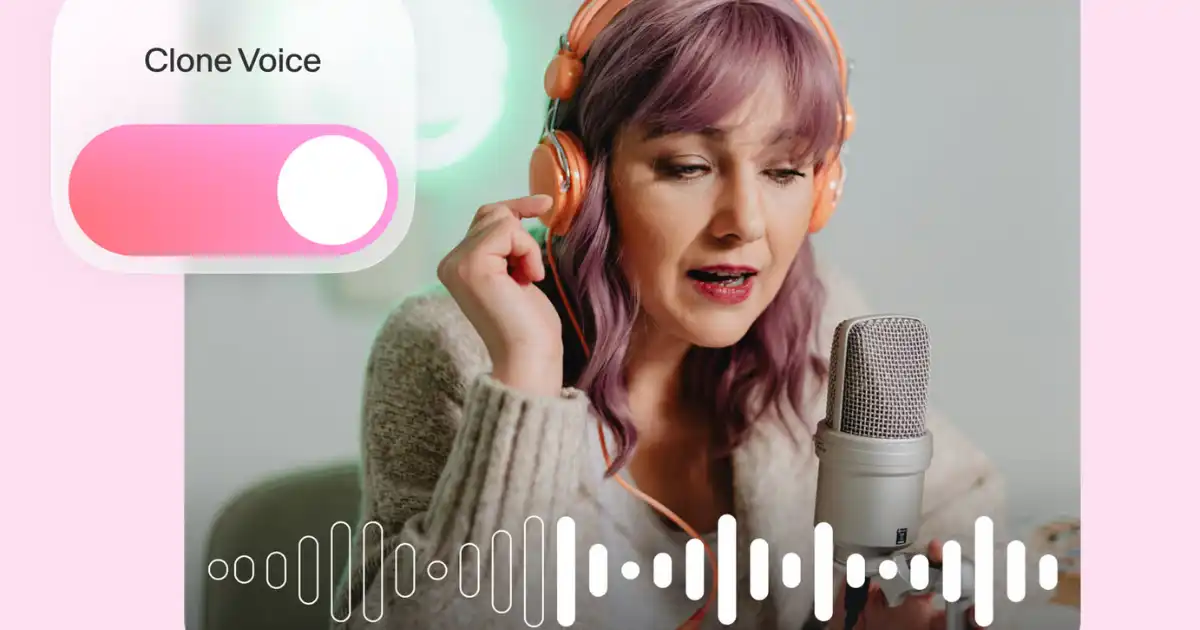
Have you ever wondered what it would be like to hear a perfect replica of your own voice—to have it narrate audiobooks, deliver podcasts, or speak on your behalf? Imagine the possibilities: creating voiceovers, automating messages, or having your voice respond when you’re not around. Thanks to rapid advances in AI, voice cloning is no longer science fiction—it’s a reality you can explore, even with free AI tools.
But how does it actually work? Can a free tool take a few minutes of your speech and clone your voice convincingly? Are there limitations, ethical concerns, and hidden pitfalls?
In this comprehensive guide, you’ll learn the nuts and bolts of voice cloning, step-by-step instructions using free tools, best practices to do it well, and how to avoid misuse. Whether you’re curious, creative, or cautious, this is your map into the new frontier of audio technology. Ready? Let’s dive into this comprehensive guide and get your voice clone up and running.
What Is Voice Cloning? (in simple terms)
Before we jump into tools and steps, it helps to have a clear picture of what voice cloning really means.
In simple terms, voice cloning is the process of using AI to create a synthetic version of your speaking voice—one that mimics your tone, timbre, accent, prosody, and idiosyncrasies. Once trained, the AI can generate new speech lines in your voice, given new text. You type or feed text, and it speaks it in your sound.
It’s not just a robotic speech synthesizer. The best modern voice clones capture nuance—pauses, emotion, slight pitch variation—and can generate pretty convincing results.
How It Works (a simplified overview)
-
Data collection
You record samples of your voice — ideally across many phonemes, variations, and contexts.
-
Preprocessing
The audio is cleaned (noise removed), segmented, aligned with transcripts, normalized.
-
Model training
The voice model is trained—mapping from textual input to audio waveform output, conditioned on the voice features.
-
Synthesis/inference
New text is passed through the model to generate new speech in your voice.
-
Postprocessing
The output is smoothed, enhanced (e.g. by using vocoders, filters) to make it more human-like.
So effectively, your vocal fingerprint is captured, embedded, and then used as the basis for new generations.
Why Use Free AI Tools?
You might ask: with so many commercial tools out there, why bother with free ones? Here are some key motivations:
-
Low barrier to entry
You don’t need to invest money up front to experiment.
-
Open learning & transparency
Many free projects are open source, letting you see what’s happening under the hood.
-
Flexibility & customization
Free tools often allow you to tinker, adjust hyperparameters, or retrain.
-
Proof of concept
Before spending money, you can test whether a cloned voice is usable for your needs.
-
Creative or academic projects
For students, hobbyists, or open-source fans, cost matters.
That said, free tools typically come with limitations in audio quality, amount of voice samples supported, compute resources, or user interface polish. But for many use cases, they’re more than adequate.
Key Challenges & Ethical Considerations
Before you clone your voice, it’s critical to understand the limits—and responsibilities.
Technical Challenges
-
Data quality
Low-quality recordings (background noise, distortion, echo) will degrade the clone.
-
Limited data
Free tools often require fewer training minutes, making it harder to capture full nuance.
-
Generalization
Cloned voices may struggle with unusual words, singing, or emotional intonation.
-
Overfitting or “robotic” feel
The model may produce overly steady, mechanical speech if not fine-tuned.
-
Compute demands
Training—even for clones—can be heavy on CPU/GPU. Free tools may throttle or restrict.
-
Licensing & usage restrictions
Some “free” tools require credit, watermarking, or forbid commercial use.
Ethical & Legal Concerns
-
Consent
Don’t clone someone else’s voice without permission.
-
Misuse risk
Voice clones can be used for impersonation, defamation, audio deepfakes.
-
Disclosure
Ethically, if you use a cloned voice (e.g. on podcasts, announcements), you should disclose you used AI.
-
Intellectual property & voice rights
In some jurisdictions, a voice may be protected—using a cloned voice commercially may face legal challenges.
-
Security & privacy
If your voice clone falls into wrong hands, someone might misuse it.
You must proceed responsibly, with safeguards (watermarks, usage policies, logging).
Which Free AI Tools to Use
Here are some of the leading free (or freemium) voice cloning or speech synthesis tools you can use right now. (Availability and features may change over time.)
| Tool | Highlights / Strengths | Limitations / Notes |
|---|---|---|
| OpenAI’s free-tier / trial features | May allow limited voice synthesis if available | Only partial features free; proprietary / locked |
| Coqui TTS (open source) | Good quality, customizable, supports voice cloning via fine-tuning | Requires technical setup, GPU recommended |
| Mozilla TTS / Mozilla’s open voice docs | Strong community, open models | Audio quality may not be state-of-the-art out of the box |
| Resemble AI (free tier / trial) | Friendly UI, browser-based, drag & drop | Limits on number of clone minutes or usage |
| VoxForge / Common Voice for data | Useful datasets to bootstrap or fine-tune | Not a full tool; more a dataset resource |
| Real-Time-Voice-Cloning (GitHub repos) | Popular open source, strong community | Requires setup, dependencies, GPU for speed |
| Descript (free plan with overdub) | User-friendly, integrated editing | Free plan may restrict usage or overwrite audio with watermark |
In practice, a popular and accessible route is using Real-Time-Voice-Cloning variant or Coqui TTS clones running on your local machine or via hosted notebook (Google Colab). Later, you can move to more polished commercial offerings if needed.
Step-by-Step Guide: Cloning Your Voice with Free Tools
Below is a walkthrough using a common open source project approach, using Real-Time-Voice-Cloning + alternative using Coqui TTS. You can adapt details to your system (Windows, Linux, macOS).
System Requirements & Preparation
Before you begin:
-
A PC or laptop with GPU support (NVIDIA preferred) helps enormously for speed.
-
Python environment (3.7+ recommended).
-
Microphone and audio recording setup (quiet room, decent mic).
-
Some free disk space (several GBs).
If you don’t have a GPU, you can use cloud GPU (free tiers) or Colab notebooks.
Method 1: Real-Time-Voice-Cloning Route
This project (on GitHub) is one of the most widely used for free voice cloning. The community has built many enhancements.
Step 1: Clone the repository & install dependencies
-
Clone the repository (e.g. via
git). -
Install required Python packages (PyTorch, NumPy, soundfile, etc.).
-
Download pretrained models (speaker encoder, synthesizer, vocoder).
Often instructions come with the repo. Use a virtual environment to manage dependencies.
Step 2: Prepare your voice samples
You’ll need a set of voice recordings:
-
Use 2 to 10 minutes of clear speech (more is better).
-
Record in a quiet, echo-free environment.
-
Use full sentences with variation, different intonations, speeds.
-
Align them with transcripts (i.e. you’ll need text files matching each audio file).
Store samples in required folders (often samples/ or wav/ directory).
Step 3: Encode speaker embedding
Using the encoder model, compute a speaker embedding from your voice samples. This embedding is a compact representation of your vocal identity. The system extracts the core features that define “you.”
Step 4: Synthesis pipeline
With the embedding in hand, you can feed in arbitrary text to the synthesizer, conditioned on that embedding, producing a mel spectrogram. Then the vocoder (e.g. WaveRNN, WaveGlow) converts it to raw waveform audio.
In the demo scripts, there is usually a demo_cli.py or demo_web.py you can run to test:
Or via web UI if provided.
Step 5: Tweak & refine
-
Experiment with hyperparameters (speed, pitch shift).
-
Try different model versions or vocoder options.
-
Clean output in an audio editor (denoise, equalize).
-
Blend with real recordings if needed for hybrid effect.
Step 6: Export & use
Export to formats like WAV or MP3. Use your cloned voice in podcasts, videos, narration, or wherever audio is needed.
Method 2: Using Coqui TTS (or similar modern frameworks)
Coqui TTS (and its predecessor, Mozilla TTS) has become more modular, supporting voice cloning via fine-tuning or few-shot approaches.
Step 1: Install Coqui TTS
Use pip:
Or clone the repo and install from source. Also install required audio dependencies.
Step 2: Choose a voice cloning model
Coqui supports several pretrained models, including ones designed for few-shot cloning where you need maybe 30–60 seconds of your voice.
Step 3: Prepare your voice clips
Collect a few short voice clips (ideally 30–60 seconds total). The better the quality and variety, the better the clone.
Step 4: Run cloning or fine-tuning
Use commands like:
The system will derive an embedding, then generate synthetic speech. You may also fine-tune a pretrained model with your samples.
Step 5: Adjust parameters
Coqui often gives control over pitch, energy, speed, and other prosody factors. Tweak them to make the result more natural.
Step 6: Output & postprocessing
Export the audio, run noise reduction, equalization, adding breath or slight randomness helps realism.
Tips & Best Practices to Make the Clone More Realistic
A voice clone is only as good as the data and tweaks you apply. Here are strategies to improve the quality:
1. Record in a quiet environment
Eliminate background noise, echoes, hums, air conditioning sounds. Use a pop filter or windscreen. The cleaner the data, the better the clone.
2. Diverse recordings
Capture different moods (neutral, excited, solemn), speeds, inflections, emotional variants. Cover as broad a phonetic space as possible.
3. Use high sample rate & bit depth
Record in 44.1 kHz or 48 kHz, 16-bit or 24-bit. Avoid lossy compression (e.g. mp3).
4. Normalize loudness & consistent levels
Ensure all samples have consistent volume levels (not too quiet, not clipped). Use normalization tools or a DAW (Audacity, Reaper).
5. Trim leading/trailing silence
Don’t leave long silent gaps—these can confuse alignment or speaker embedding.
6. Balanced dataset
Don’t include only one style or one pace. Vary sentence lengths, punctuation, question vs statements.
7. Postprocess synthetic audio
-
Add slight noise floor or breath to hide “too clean” artifacts
-
Use de-essing, EQ, compression
-
Blend synthetic with small real voice snippets for hybrid realism
8. Test unusual words, accents
Challenge the model with exotic words, names, slang. See where it fails, and retrain with more data covering those cases.
9. Iterate & fine-tune
You rarely get a perfect clone on first try. Adjust hyperparameters, retrain with more or different samples.
10. Use watermarking or disclaimers
If you use the cloned voice publicly, embed a faint audio watermark or disclaim in metadata that it’s synthetic.
Sample Use Cases for a Cloned Voice
Once you have a voice clone, you can use it in many creative ways. Here are some ideas:
-
Audiobook narration
Let your clone narrate your books or stories without needing to record every chapter.
-
Podcast segments
Insert AI-spoken intros or voice drops in your podcast episodes.
-
Voiceover for video content
Use it in YouTube, tutorials, or explainer videos.
-
Accessibility
Create synthetic voices for accessibility tools (e.g. reading texts aloud).
-
Personal assistant / chatbot
If you build a voice assistant, it can speak in your voice.
-
Interactive storytelling or games
NPCs, dialogue spoken in your clone voice.
-
Announcements or greetings
Use in IVR systems, voicemail, welcome messages.
In many cases, you might mix your real recordings with the clone output—for example, you record emotional parts yourself and let the clone generate routine narration.
Common Pitfalls and How to Avoid Them
No process is foolproof—here are problems you might face, and how to mitigate them.
| Problem | Likely Cause | Solution |
|---|---|---|
| Robotic, flat voice | Overfitting or insufficient training data | Add more diverse samples; adjust prosody parameters |
| Distorted or noisy output | Low-quality input or vocoder artifacts | Use cleaner recording chain; try alternate vocoder model |
| Mispronunciations or glitches | Model has not seen certain phonemes | Add samples containing problematic phonemes; fine tune |
| Poor performance on emotional tone | Lack of expressive examples | Include emotional variations in your dataset |
| Model too slow or resource heavy | Running on CPU or low compute | Use GPU, adjust model size or use lighter vocoder |
| Overgeneralization (the clone sounds like many voices) | Model embedding not specific enough | Use more speaker data, or retrain embedding module |
| Unintended misuse or leakage | Weak access control or API exposure | Protect your model, track usage logs, watermark output |
By anticipating these issues, you’ll be better prepared to debug or improve your voice clone.
Ethical, Legal & Practical Safeguards
We touched on concerns earlier, but here are concrete steps you should take:
Consent & Permission
-
Only clone your own voice or someone who explicitly consents.
-
Document consent if needed (written, recorded).
Transparent Disclosure
-
Whenever you use synthetic voice in public, mention you’re using AI.
-
Provide disclaimers so that listeners know it’s not a real live speaker.
Watermark & Metadata
-
Embed inaudible audio watermarks to trace your own output.
-
Set metadata tags (e.g. “AI-generated”) in your audio files.
Access Control & Storage Security
-
Don’t publish your raw model or embedding publicly.
-
Restrict who can use or invoke it.
-
Monitor usage, logs.
Use Limits & Governance
-
Avoid using voice clones for fraud, impersonation, deepfakes.
-
Respect local laws (some regions prohibit voice impersonation).
-
Consider limiting your clone to benign domains (books, narration, not identity theft).
Periodic Auditing
-
Listen to your outputs critically.
-
Ask others to detect anomalies.
-
Update, refresh, or disable the clone if misuse or error surfaces.
Advanced Considerations & Further Exploration
If you become comfortable with basic cloning, there’s more you can explore:
Multi-speaker cloning
Train a model to clone multiple voices (e.g. family members), and switch among them via embeddings.
Cross-language cloning
Clone your voice in other languages. If you speak multiple languages, you can record samples in each and let the model generate in all languages.
Style transfer & emotional control
Train your clone to mimic styles—e.g. excited, sad, whispering, shouting. Use style tokens or control embeddings.
Real-time cloning / voice conversion
Some research enables converting live speech input from one voice to another in real time—voice conversion rather than full TTS.
Hybrid systems
Blend your clone voice with another model or human voice for better effect, e.g. partial augmentation.
Continued model updates
As you gather more voice samples over time, keep retraining or fine-tuning to refine the clone.
Monetization & services
If your voice clone is compelling, you might offer voice services—narration for others, voice packs, etc. But always keep a strong ethical backbone.
Walkthrough Example (Illustrative)
Here’s a fictional but realistic example of a small project:
-
Record 5 minutes of your own speech: 20 sentences, varied, in quiet room, 44.1 kHz, 16-bit WAV.
-
Transcribe them exactly, line by line.
-
Use Real-Time-Voice-Cloning:
-
Listen to result. It may sound good but slightly robotic.
-
Realize that “intelligence” and “characterization” are weak—maybe add more emotional lines (“I’m excited!”).
-
Add 2 more minutes of emotional speech, retrain embedding.
-
Use alternate vocoder (e.g. switch from WaveGlow to WaveRNN).
-
Postprocess: normalize, light equalization, insert tiny hiss/ambience.
-
Test with a paragraph from your blog. Use it as narration.
-
Embed a short watermark: a soft “clone by AI” at start or inaudible tone.
-
Use it in a video or podcast intro, with a disclaimer: “This intro is AI-generated from my cloned voice.”
By iteration, you can make the result surprisingly good.
Checklist Before You Publish or Use a Cloned Voice
-
Data recordings are high quality
-
Transcriptions match exactly
-
Model embedding captures your voice signature
-
Output speech has been tested on varied sentences
-
Postprocessing (EQ, noise, smoothing) done
-
Disclosures/watermarks embedded
-
Access is secure, usage monitored
-
Ethical and legal aspects considered
If you tick all these, you’re in strong shape to use your cloned voice confidently.
You Might Be Interested In
- How To Change Tone Of Writing With Ai?
- What Are Network Hardware Components?
- What Is The Simple Definition Of Blockchain?
- How To Use Google Free Ai Tools For Personal And Business Tasks?
- How To Add An Ai Chatbot To Shopify?
- Securing IoT Devices at Home and in the Enterprise
- 9 Ai Study Assistants That Help You Learn
- How Do I Make An Ai Voice For Lunamon?
- How To Write Genetic Algorithm Code?
- How Can Developers Start Working With Ai Tools Effectively?
Conclusion
Voice cloning once resided in the realm of science fiction. Today, thanks to advances in AI and open source tools, you can experiment with cloning your own voice using free or freemium tools.
It’s essential to approach this technology with respect and responsibility—voice is deeply personal, and misuse can cause harm. But within boundaries, a cloned voice can be an incredible creative tool: from narrating stories to making dynamic audio content when you’re not recording.
If you take your time to record high-quality samples, iterate carefully, and treat your clone ethically, you’ll be amazed how authentic the results can become.
FAQs about Clone Your Voice
How to clone any voice with AI free?
Cloning a voice with AI for free is easier than ever, thanks to the rise of powerful online tools. You can use platforms like ElevenLabs (free trial), FakeYou, or Voice.ai, which allow you to record or upload a short sample of a voice. The AI then analyzes the tone, pitch, accent, and rhythm to create a digital version that sounds nearly identical. Once cloned, you can type any text, and the AI will speak it using that cloned voice. Most tools guide you step-by-step—just upload a clean, clear recording, wait a few minutes for processing, and you’ll have your custom voice ready to use.
It’s important to note that the quality of the clone depends on how good your input sample is. A quiet environment, good microphone, and clear speech make a big difference. Also, while these tools are free to start, some may limit the length or number of generated clips. Still, for experimenting, learning, or creating fun content, the free versions are more than enough to get started with professional-sounding voice cloning.
Is AI voice cloning illegal?
AI voice cloning itself is not illegal—it’s the way it’s used that can create legal or ethical problems. For instance, cloning your own voice or using AI-generated voices for creative projects, educational content, or entertainment is completely fine. However, using someone else’s voice without permission—especially for commercial purposes, impersonation, or deception—can break privacy, copyright, or defamation laws. It can also violate a person’s right to control how their likeness or voice is used.
In short, always get permission before cloning someone’s voice, especially if that person is famous or identifiable. Many countries are now updating their laws to address deepfakes and AI-generated content, so it’s wise to stay aware of local regulations. If you’re using voice cloning for fun, parody, or learning—and not to mislead or profit from someone else’s identity—it’s generally safe and legal.
How to make an AI generated voice for free?
You can make an AI-generated voice for free by using online platforms such as TTSMaker, ElevenLabs (free plan), or Uberduck.ai. These tools allow you to convert written text into natural-sounding speech using AI voice models. Simply type or paste your script into the box, choose a voice you like—male, female, deep, robotic, or even character-inspired—and click “generate.” Within seconds, you’ll hear your text spoken in the chosen AI voice.
Some websites even let you tweak details like speed, emotion, or accent to make it sound more realistic. If you want a custom voice that sounds like you, you can upload a short voice sample and let the AI learn its patterns. Most of these tools are web-based, meaning you don’t need to install anything. Whether for podcasts, videos, or fun experiments, free AI voice generators offer a creative way to bring your words to life with just a few clicks.
How do I change my voice with AI for free?
You can change your voice with AI for free using real-time voice changer apps such as Voicemod (free version), Clownfish Voice Changer, or Voice.ai. These tools let you speak into your microphone, and the AI instantly modifies how your voice sounds. You can make your voice deeper, higher, robotic, cartoonish, or even mimic celebrities and fictional characters, depending on the tool you choose.
Most of these programs are easy to set up—just download the app, connect your microphone, and select a voice filter or effect. You can use them for gaming, live streaming, or chatting online. The free versions usually come with a limited number of effects, but they’re still fun to experiment with. They’re also a great way to explore how AI can reshape sound in real time, adding personality or humor to your conversations and content.
Is voicemod free?
Yes, Voicemod offers a free version that allows users to change their voice in real time, though it has some limitations. With the free plan, you can access a rotating selection of voice filters that change every day. These effects can make you sound like a robot, a monster, a chipmunk, or many other fun characters. The free features are more than enough for casual use, especially for chatting with friends, gaming, or trying out content creation.
However, if you want full access to all voice filters, sound effects, and customization tools, Voicemod also offers a paid “Pro” version. The premium plan lets you fine-tune your sound, mix voices, and create custom effects. Still, the free version is a great place to start—it’s simple, lightweight, and gives you a taste of how AI-driven voice modification works without any cost.
